

User Guide
User Guide
Getting Started
Create a Comp, and add a Solid layer in comp size.
Apply the ‘Add Helium Effect’ from the Helium menu in the Effects menu. This opens the preset browser.
Click on one of the Models in the Quick Links, and click the Apply button, or double click. You should now have a model in your comp connected to a 3D null. Using this null you can animate the model position, scale and rotation.
With any question or issue, please send us an email.
Basic Concepts
3D Effects , solo or mixed
Helium is a toolset of 3D effects for Adobe After Effects, some of the effects, such as Model, can be applied solo, while other effects, such as Cloner or Material, have to be mixed with other Helium effects.
When applying multiple Helium effects on a single layer they share the same 3D space. You can also add Helium setups from other layers or comps using the ‘Helium Comp’ effect, composing multiple 3D scenes in a single unified 3D space.
All The basic effects are in Quick Links / Helium Tools
Basic Tools
Model – Import a 3D model
Extrude – Extrude and animate 3D Text and Paths
Primitive – Add basic 3D shapes such as cube, sphere, plane, or more
Spline – Create a 3D spline from a mask or lights
Terrain – Create terrain surfaces from height maps
Scroll – Add 3D page scroll effect
Mirror – Add a planar mirror to your scene
Material – Add material that affects the appearance of models
Helium Comp – Add an entire Helium setup from another layer or comp
Volumetric Lights – Create a volumetric light effect that respects the rest of the 3D scene
Cloners
Array Cloners – Cone your 3D objects in various array shapes such as grid or circle
Fill Cloner – Clone using non overlapping circles, enable you to scatter non overlapping objects
Procedural – Clone using an algorithm
Simple Cloner – Clone a single object using a null
Transform Cloner – Clones using Position / Scale / Rotation
Path Cloner – Clone models along a 2D or 3D path
Transform
Scatter – Scatter the objects using perlin noise
Transform – Transform the models
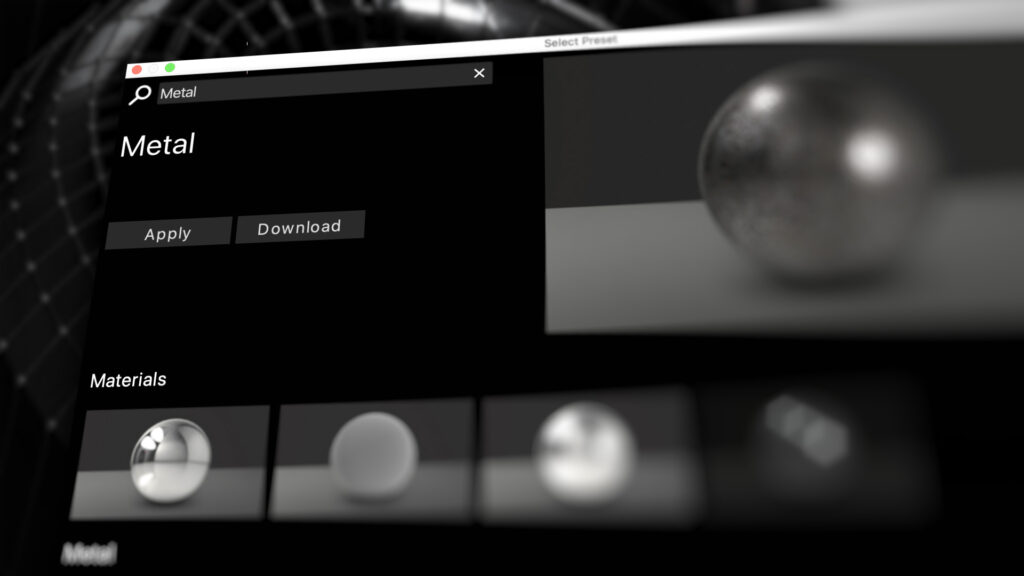
Preset Browser
Helium Preset browser allows you to create 3D effects in your scene with One click, you can load ready to animate 3D Models, Text, Spline and more.
Once loading a preset it will be added to your layer, and will coexist with other Helium effects on the same layer.
The preset browser includes the full set of the basic Helium tools , it is located at Quick Links / Helium Tools
Use the Search to quickly access all of Helium effects, search for things like – Model , Material , Metal , Spline etc’
Edit Button
Many of the Helium Effects has a preset mechanism to choose its basic style, eg with a 3D Text the edit button will open a browser to choose from different Extrude Styles, Materials and Animations
Choose a basic preset. Then use the edit button to choose and mix its style and you have countless options with just a few clicks.
Fast Previews
While creating the scene , placing the Models and animating it, best practice is to work in Half Res in the comp, this will improve speed greatly .
Objects Anchor Point
Helium Objects are created and placed at Zero Axis and they are animated and positioned using a controlling 3D Null.
There are several situations when you would keep your animation around the Zero Axis, for better and easier results.
Cloning – Keeping the Model around the Zero Axis, gives better control of the cloned objects, regarding scale and position. You can then place the Objects post cloning using a control Null in the Cloner.
Pre-Compose – when pre composing 3D objects it is best to keep the objects around the Zero axis , this way your Scene anchor point is in the same place regardless of different comp sizes.
Importing 3D models from other softwares. Keeping the Model Null at Zero, will ensure that the model is in the same space as it was in the other 3D package.
Pre Comp -Helium Allows you to 3D comp several Helium setups together, in a shared unified 3D space.
With ‘Helium Comp’ you can add a setup from another Helium Layer in the same comp, this layer may be a Comp that contains a Helium setup.
This way you can create highly sophisticated 3D animation, by combining together multiple 3D setups, all while keeping your project simple and tidy.
Motion delay
All basic objects in helium have a controlling 3D Null, this is an After Effects Layer that controls the position, scale, and motion of the object.
When cloning objects you can add a Motion Delay effect, sampling this 3D Null animation at different times for creating very cool animation. Also when comping another setup you can adjust that entire setup motion dealy.
Effects Shared Controls
All helium effects on a single layer have shared params:
- Add – Add another helium setup. You can also Add from the Effect menu, by applying then Add Helium Effect
- Environment – Set Environment for image based lighting. You can load a preset for the environment or point to a layer in the comp. When an environment is applied, a Null that contros its orientation is added to the scene.
- Shadow Effect – This controls how much the Environment is affected by the comp Light Shadow / Light areas , giving a more soft or hard look.
- Render Settings – This set the quality of the render and the clipping
- Quick Select Null – For effects that has a motion null , such as the Model and Primitive, this will select the 3D null in the comp
Material Param
The material param lets you choose whether to prefer the embedded material preset, or to use the first available material effect.
Enable / Disable – Choose either to prefer the embedded material or a separate material effect.
Extract – You can also use it to extract the current preset, or embedded model material into separate effects.
Collapse – collapse material effects data into a model effect to declutter the view.
Load a 3d model preset , extract the materials , edit it’s properties and collapse it to clear the effect from the view. The data will be stored with the Model Effect.
Settings – For effects that has a main texture layer , such as Primitive , Spline etc’ you can assign that texture to the Emissive channel or the Diffuse (the default value).
Texture Override
In some effects such as the Primitive and Extrude, a color and texture params will override the embedded material settings. For example, if you assign the texture in a primitive it will override the material diffuse texture.
Remove Material sources – Delete a Material Effect with its sources to declutter the comp.
Constructing Complex Scenes
Helium has creator effects that create 3D models, and modifier effects that affect the number, behavior, or look of creator effects.
Complex scenes are built by stacking up multiple Helium effects. Modifier effects apply to effects appearing before them, but not to effects that appear after them. For example, a Cloner following a Model will apply to that Model, but not to a Model that follows it, and a Material that follows an Extrude will apply to that Extrude, but not to an Extrude that follows the material.
Creator effects are: Model, Primitive, Extrude, Spline, Terrain, Scroll, and Mirror.
Modifier effects are: Material, Cloners, Transform, Scatter, Procedural
Similar to regular pre-comps in After Effects, Helium Comp allows you to insert an entire Helium setup into the stack. Modifier effects inside a Helium Comp affect only other effects inside that comp, but not the outside comp.
In addition, Helium has post effects, effects that change the appearance of the entire Helium setup: Volumetric Light, and Fog.
Effects
Model
With the Model effect you can import a 3D model, in OBJ format. Just click the Import button, the OBJ will be added as a layer, together with a controlling motion null. With this null you can animate the model position, scale and rotation.
Textures will auto load if they are placed in the same folder containing the names : Color, Metalness, Normal, Roughness, Emissive or described by an .mtl file.
The textures are placed in the Helium folder in the project and in the Helium Assets Comp for Collect Files to work.
There are some sample 3D models included as presets, these will load together with materials ready for animation.
Most game-ready OBJ’s should auto load.
Model Groups – Controls the visibility and transformation of Model Groups (for OBJ file type)
When a compatible 3D model has Group data, you can use the Create Groups button, this will create an effect control for each model group.
Model requirements :
OBJ format
The object should already have UVs and Normal Data.
PBR materials in the metallic workflow.
FBX limited support
Import FBX files , the data that will be imported includes Vertices, Normals, UVs, Tri and Quad Faces and Material Names.
Textures for a single material objects will auto import if located in the same folder and include the Helium name convention.
Extrude
With the extrude effect, you can create Animated and textured 3D Text and paths.
Once an extrude is created, you can press the Edit button to change its style, material, or animation.
To start from a preset, open the Preset browser and apply any of the Extrude presets, a text layer would be added where you can change the text to your own. You can press the Edit button to change its style, material, or animation.
Primitives
Create a basic 3D shape.
Multiple Materials – Some primitives such as box, can have more than one material for different parts of the shape. When enabling this, you need to add Material effects.
Spline
Create a 3D Spline from a Mask or Lights.
Start from a preset, and reshape the path.
You can create a spline from a path on another Layer, a Light path with a name specified or from several Lights to create a moving Spline.
Once a spline is set, you can use the Edit button to choose its Style, Profile and Material
Terrain
Create Terrain surfaces using Height maps and Texture.
Quality – Mesh quality is auto set by the height map dimension , you can set it to custom for user controllable mesh settings.
Best Practice – work in 16bpc for better accuracy
Add Box – Create a base box for the terrain.
Scroll
Add 3D page scroll effect
Mirror
Add a planar mirror to your scene.
The reflection and roughness parameters affect the reflectivity and roughness of the embedded material, unless there’s an external material that overrides the embedded material.
The reflection can fade with the distance from the mirror. The Fade Start parameter indicates where the reflection starts fading, and the Fade End parameter controls where the reflection ends. To disable fading, set the Fade End parameter to 0.
Material
Add material Effect to be mixed with one of the models
Choose Materials – When a Material is stacked with a model Effect, you can assign the material effect to a model.
Helium Comp
Add another Helium setup from another layer or comp. This allows you to easily construct complex scenes in a modular way without cluttering your project.
Choose a layer with a Helium effect or a comp with a Helium effect inside. This will add that setup to the current one.
You can then add a control null both for the group of objects in that setup or to adjust the base models.
You can also create motion delays to the controlling nulls
Volumetric Lights
Add a Volumetric Light effect that respects the 3D scene. You can press the Edit button to choose from different style of volumetric lights.
Fog
Add fog to your scene
Cloners
Cloners create additional copies of 3D models, while modifying
Like other modifiers, cloners affect everything before them on the stack.
With the cloners you can clone on or more Model. By default all preceding models in the Stack will be cloned. In some cloners you can choose from cloning All modes or randomly selecting a model from the stack to clone per clone.
Offset type – Choose how to delay the Motion Nulls , depending on the cloner you could have the delay to be sequenced or random.
Array Cloners
Cone your 3D objects in various array shapes such as grid or circle
Fill Cloner
Clone using non overlapping circles, enable you to scatter non overlapping objects
Procedural
Clone using an algorithm
Simple Cloner
Clone a single object using a null
Transform Cloner
Clones using Postion / Scale / Rotation
Path Cloner
Clone models along a 2D or 3D path
Transform
Scatter
Scatter the objects using perlin noise
Transform
Transform the models
3D Wireframe
Add a 3D wireframe , rendering objects along the object edges and vertices. Use the edit button to choose the objects to use with the vertices and edges.
To add 3D wireframe, apply the effect on top of an object such as 3D model, 3D text etc’
Map
Place objects on a 3D Terrain. Displace the objects by a height map.
With the Map effect, you can match multiple object position to a Terrain effect, or height map, you can then apply a second map as density.
Abstract
Create organic effects using procedural noise generators and custom maps.
Start from a preset, and edit the basic shape and noise. You can also apply a custom layer to affect the noise.
Use the Edit button to choose the effect base Shape, Noise and Material
Volume Rendering
You can import a VDB file to create Smoke and Fire effects.
Please visit these websites for VDB files (paid and free samples) :
EmberGEN
jangafx.com/software/embergen
Pixel Lab
www.thepixellab.net
To add a VDB file to a Helium setup, add a Volume Effect using the preset browser. (You may search for ‘Volume Smoke’)
Use the import button to choose the VDB file , if it’s a VDB sequence , Helium will auto detect it and load it as such.
Once loaded , it is best to first adjust the basic size, using the Size / Density param, this will act as a world scale, so if the VDB is described in a very small space and you wish to get it closer to your comp dimension, using this param is the recommended way.
Once the VDB is visible you can further adjust its position and scale using the 3D Null.
The next step is adjusting the look of the Volume, you can use the edit button to choose a basic preset to start from. Note that presets with Fire expect fire / heat information in the VDB file.
You can then adjust some basic parameters –
Density – Affects the overall density of the Volume.
Color – The basic color of the Volume
For Volume with Heat / Emission –
Emission – Sets the amount of the emission
Emission Color – The emitter Color
Absorption – Sets the amount of light absorbed in the volume.
You can further adjust the Volume Material by extracting it to a separate effect and adjusting further params such as the directionality, the shadow amount, brightness and more.
Advanced params :
Auto Resolution – When disabling this param, you can resample the VDB file to the specified amount.
Smooth – Apply a gaussian smooth to the Volume.
Channel Setting – By default Helium will auto set the density and heat (if available) channels, you can select these manually if needed.
You may offset, trim, and speed the VDB layer in your comp, this will affect the rendered result.
Limitations – Helium currently supports ONE volume render per setup.
HeliumX AI
Install
- Download the HeliumX plugin from our website or aescripts.https://aescripts.com/helium/
- Install HeliumX plugin
- Install invoke AI (if its not already installed)To download the AI Models you will need to have a Hugging Face account and token
Open a Hugging Face account : https://huggingface.co/
Create a token – https://huggingface.co/settings/tokens
Install python – https://www.python.org/downloads/release/python-3109/
Install the Invoke AI – https://github.com/invoke-ai/InvokeAI/releases/tag/v3.2.0
Follow the on screen instruction
Important notes:
HeliumX AI supports Invoke AI version 3.2.0
Enter your Hugging face token during the installation, you can choose to install the SDXL models during the Invoke AI install, or use HeliumX to install them.
First Steps
Open the HeliumX AI panel from the After Effects Window menu.
On the first run, HeliumX AI will ask for the location of the Invoke AI folder. It is used to run Stable Diffusion in the background.
First run on every session may take longer as the SDXL Models are loaded into memory. To generate an image, enter a prompt and click Generate.
Resolution and Aspect are auto set from the current Active Comp, the default is a 1024 x 1024 , and HeliumX AI will auto scale to supported resolutions of SDXL.
Basics
Once the result image is ready ,it will appear on the image browser , you can then choose to add it to the project and current comp, using the ‘Add to Comp’ button
You can reuse a prompt using the ‘Use Prompt’ button
Style
Apply any of the style presets to achieve better results with a short prompt.
Image to Image
Choose a comp to grab the source frame(s) from, set frame or sequence , grab the source frame(s) and adjust the image weight.
Sources will be saved in the Helium / Sources Folder in the user Document folder.
ControlNet
You can have better control over the result images using ControlNet, to use, grab a source image from the active comp to use as reference.
Models
You can import custom SDXL models , either using the Invoke AI Web app or using the HeliumX panel
To import, choose the model tab , and press the ‘+’ button , you can add models that you have on your hard disk , or from a huggingFace link. Once added, the model will appear as a preset that you can apply.